_1.gif)
_1.png)
What do I need to print with flexible filament?
Flexible Filaments
Printing flexible filament is more complicated than working with rigid filaments. By their very nature, they present various problems when using them, especially if you do not have a 3D printer prepared to work with them. However, with a good configuration of our 3D printer it is very easy to obtain great results with a good printing speed.
In this section you will find everything you need to work with flexible filament in your 3D printer. If you see that something is missing, do not hesitate to contact us.
First Steps
Extruder for flexible filament
The most important thing to print with flexible filament is to have a good extruder. Most commercial 3D printers already incorporate a compatible extruder, for more information on compatible printers visit the corresponding section in the section of the material you want to print in this article. If you have a RepRap printer and you do not have a compatible extruder, there are several alternatives on the market and also many freely designed extruders that you can use to improve your printer.
The key points to take into account when choosing an extruder are the following:
- Filament guidance
- Friction
- Filament pull
- Nozzle size
Filament guidance
Any slight gap between the flexible filament pushing system and its entrance to the hot-end can cause the filament to begin to wind in this gap.
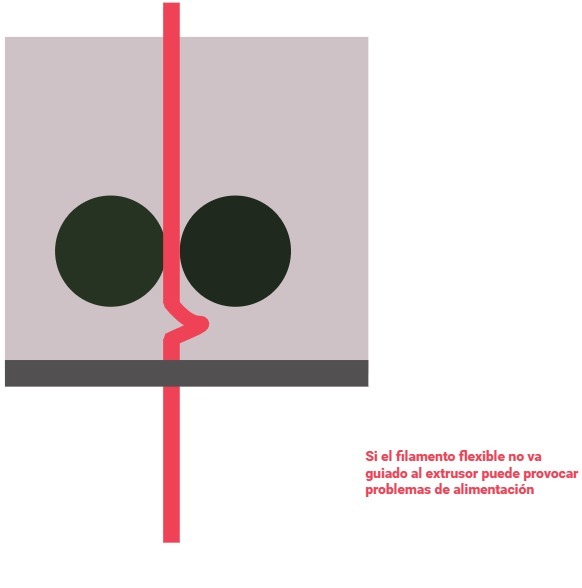
To solve this, we need this gap not to exist in our extruder. The objective is for the filament to be completely guided to the hot-end.
.jpg) |
Commercial extruders prepared for printing withflexible materials will not present this problem. If you have a RepRap extruder you have two options, either assemble a new one that is prepared or print a wedge-shaped part that solves this problem. Although the best option is to update our extruder.
Friction
Excessive friction of the filament with the extruder elements can cause problems in the feeding of material.
To solve this problem there are several things we can do. The first thing is to use direct extrusion systems. In a Bowden system, excessive friction of the filament with the guiding tube is generated.
We must also ensure that the distance between the pulleys and the hot-end is as small as possible.
Another very important aspect is to work with barrels in the hot-end that have a PTFE tube incorporated. The Teflon tube (PTFE) reduces friction and acts as a thermal insulator, preventing the filament from expanding before reaching the hotend heating zone.
Filament traction
Unlike with rigid filaments, achieving good traction with flexible material is more complicated.
We must look for an extruder that allows us to adapt the traction that is carried out on the filament. The most used system for this has always been a lever-like arm pressing the filament thanks to the force of a spring.
.jpg) |
Now we have more complex systems that offer better results. Also work with two toothed pulleys instead of a pulley and a bearing. If the filament slips on the bearing, we will not get optimal traction from it.
Nozzle size
The size of the nozzle is related to the quality of the printed pieces. The smaller the size, the lower layer height we can achieve and therefore greater definition in the piece.
However, when dealing with flexible filament a very small nozzle size can cause excessive pressure inside the hot-end, which will cause the output flow toof the material is not constant.
The printing speed that we can achieve withflexible material is also directly related to the size of the nozzle. We can obtain the best quality/speed ratio using 0.4 to 0.6 mm nozzles.
Once we have chosen the perfect extruder to work with flexible filament, we are going to see the first steps to start printing.
The first thing is, of course, the loading of the filament in our printer. For this, the ideal is that we work with an exclusive hot-end for flexible filament.
If this is not our case, we will first remove the previous filament. It is advisable to extrude a little before removing the filament. With this we will be able to eliminate impurities at the nozzle outlet and ensure that the material flows correctly.
Once removed, we will set our hot-end to the recommended temperature to work with each material (see corresponding section). Once the filament has been introduced and seeing that it comes out of the nozzle, it is advisable to extrude a little filament, especially if We make the change from something hard like PLA or ABS.
And we are almost ready to print! Now depending on which filament you are going to work with, you should visit its corresponding section for the particular considerations of each one.
Tips
To achieve perfect results it is necessary to modify our printing profile depending on what we want to achieve.
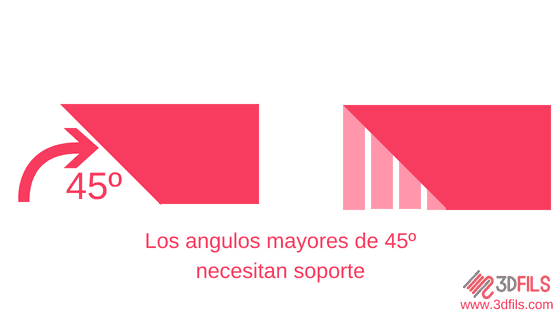
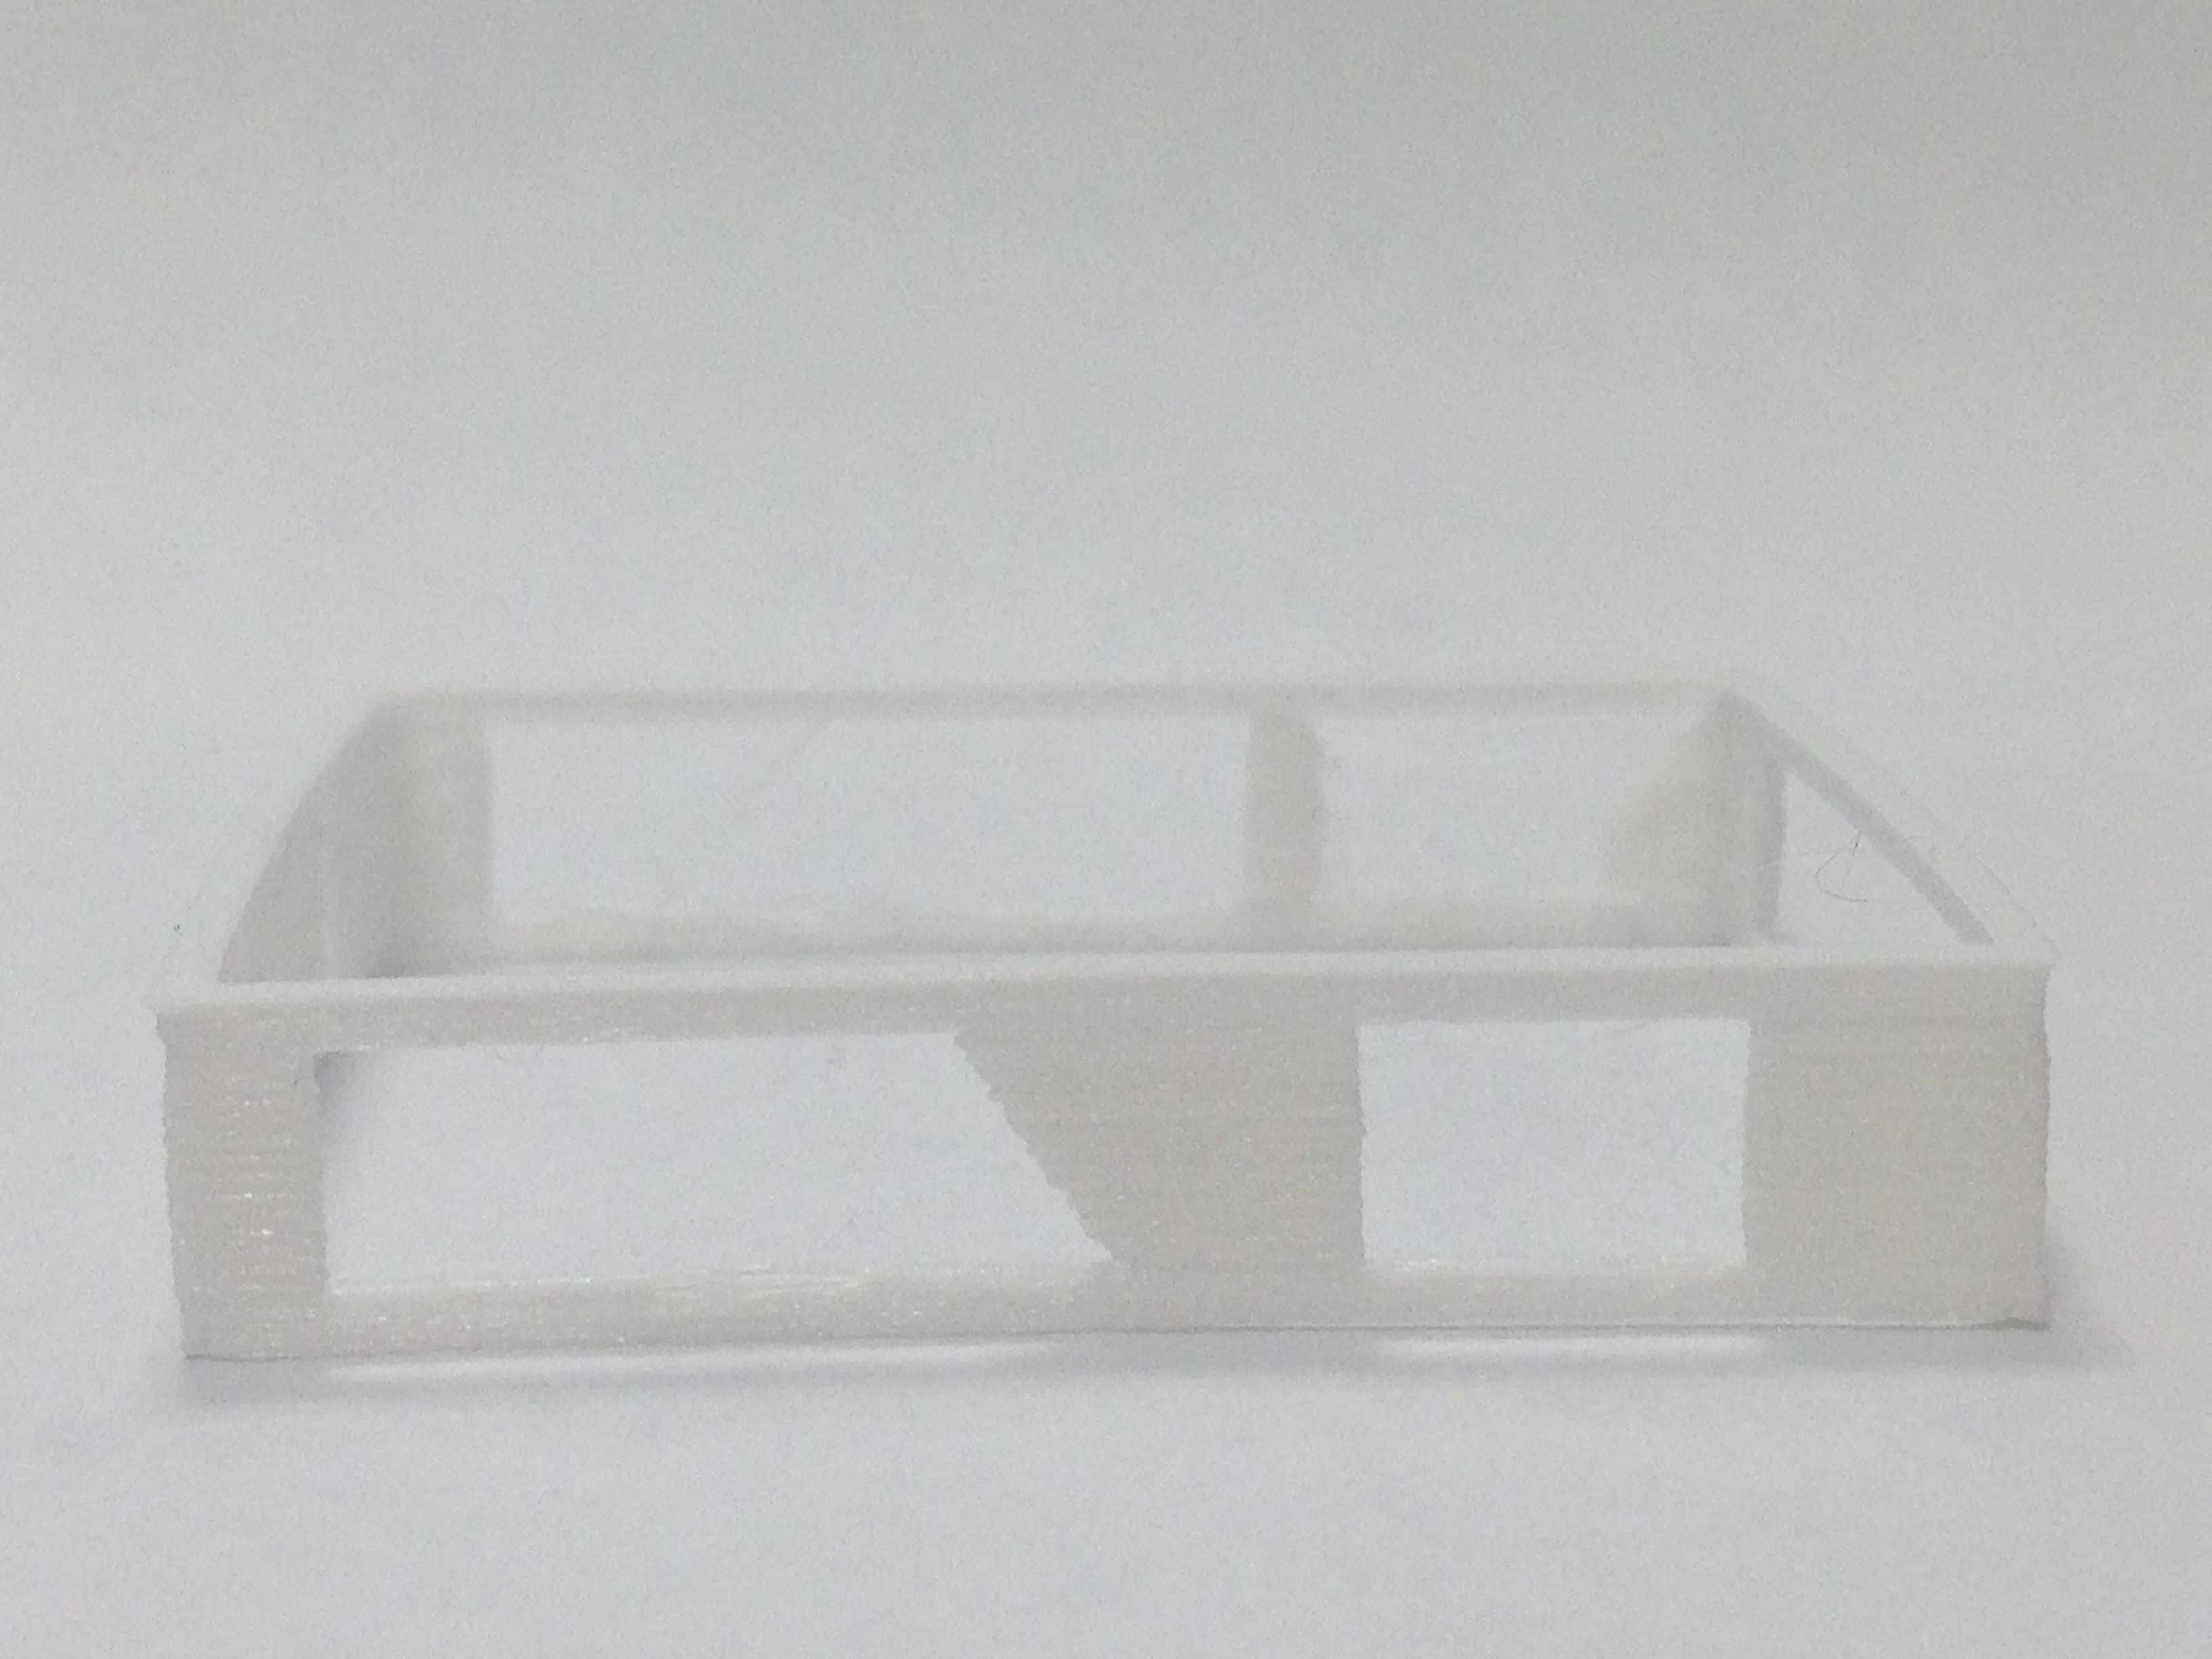
Hanging parts
It is possible to print hanging parts with eFil, for this we will need an extruder that has a layer fan. Most extruders today have this. If yours does not have it, you can try to improve it with the following parts:
By activating the layer fan when our 3D design has exposed parts, we will ensure that these solidify sooner and serve as support for the following layers.
  |
Support
Using support with eFil can be problematic when removing it, since it will be very adhered to the piece. To do this, it is recommended that when designing the piece we add supports whose contact with the piece is as minimal as possible.
Troubleshooting
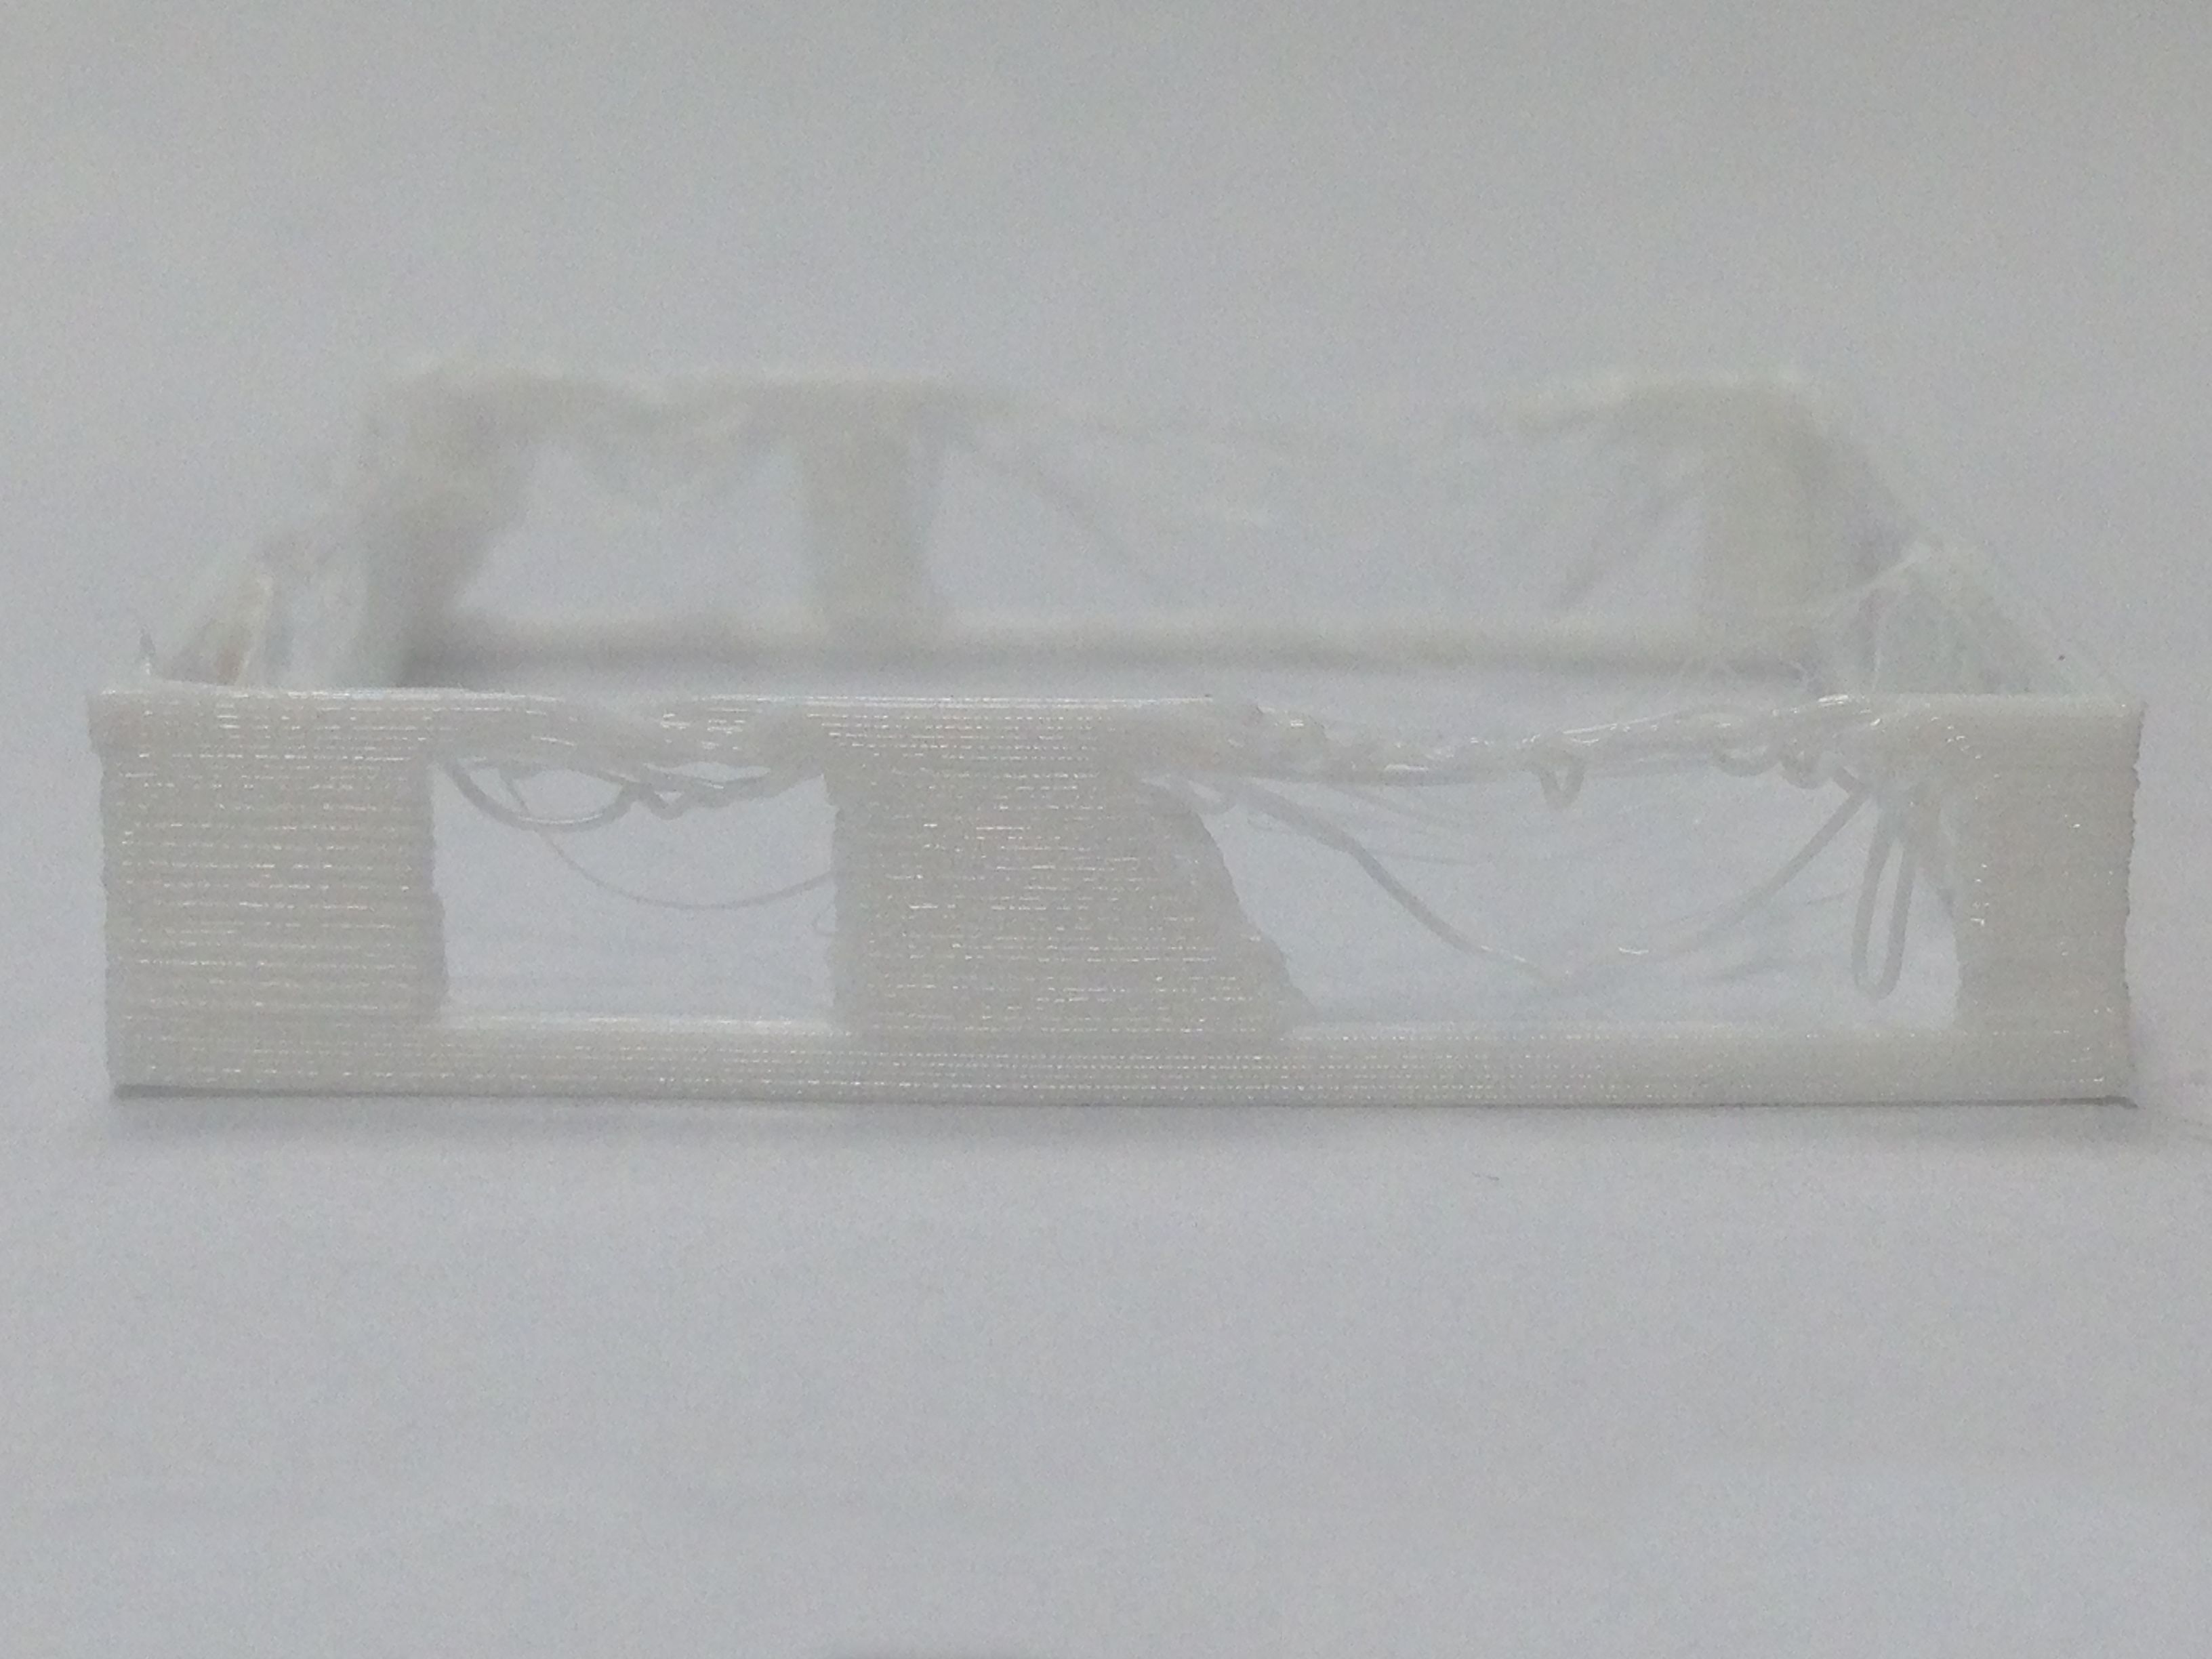
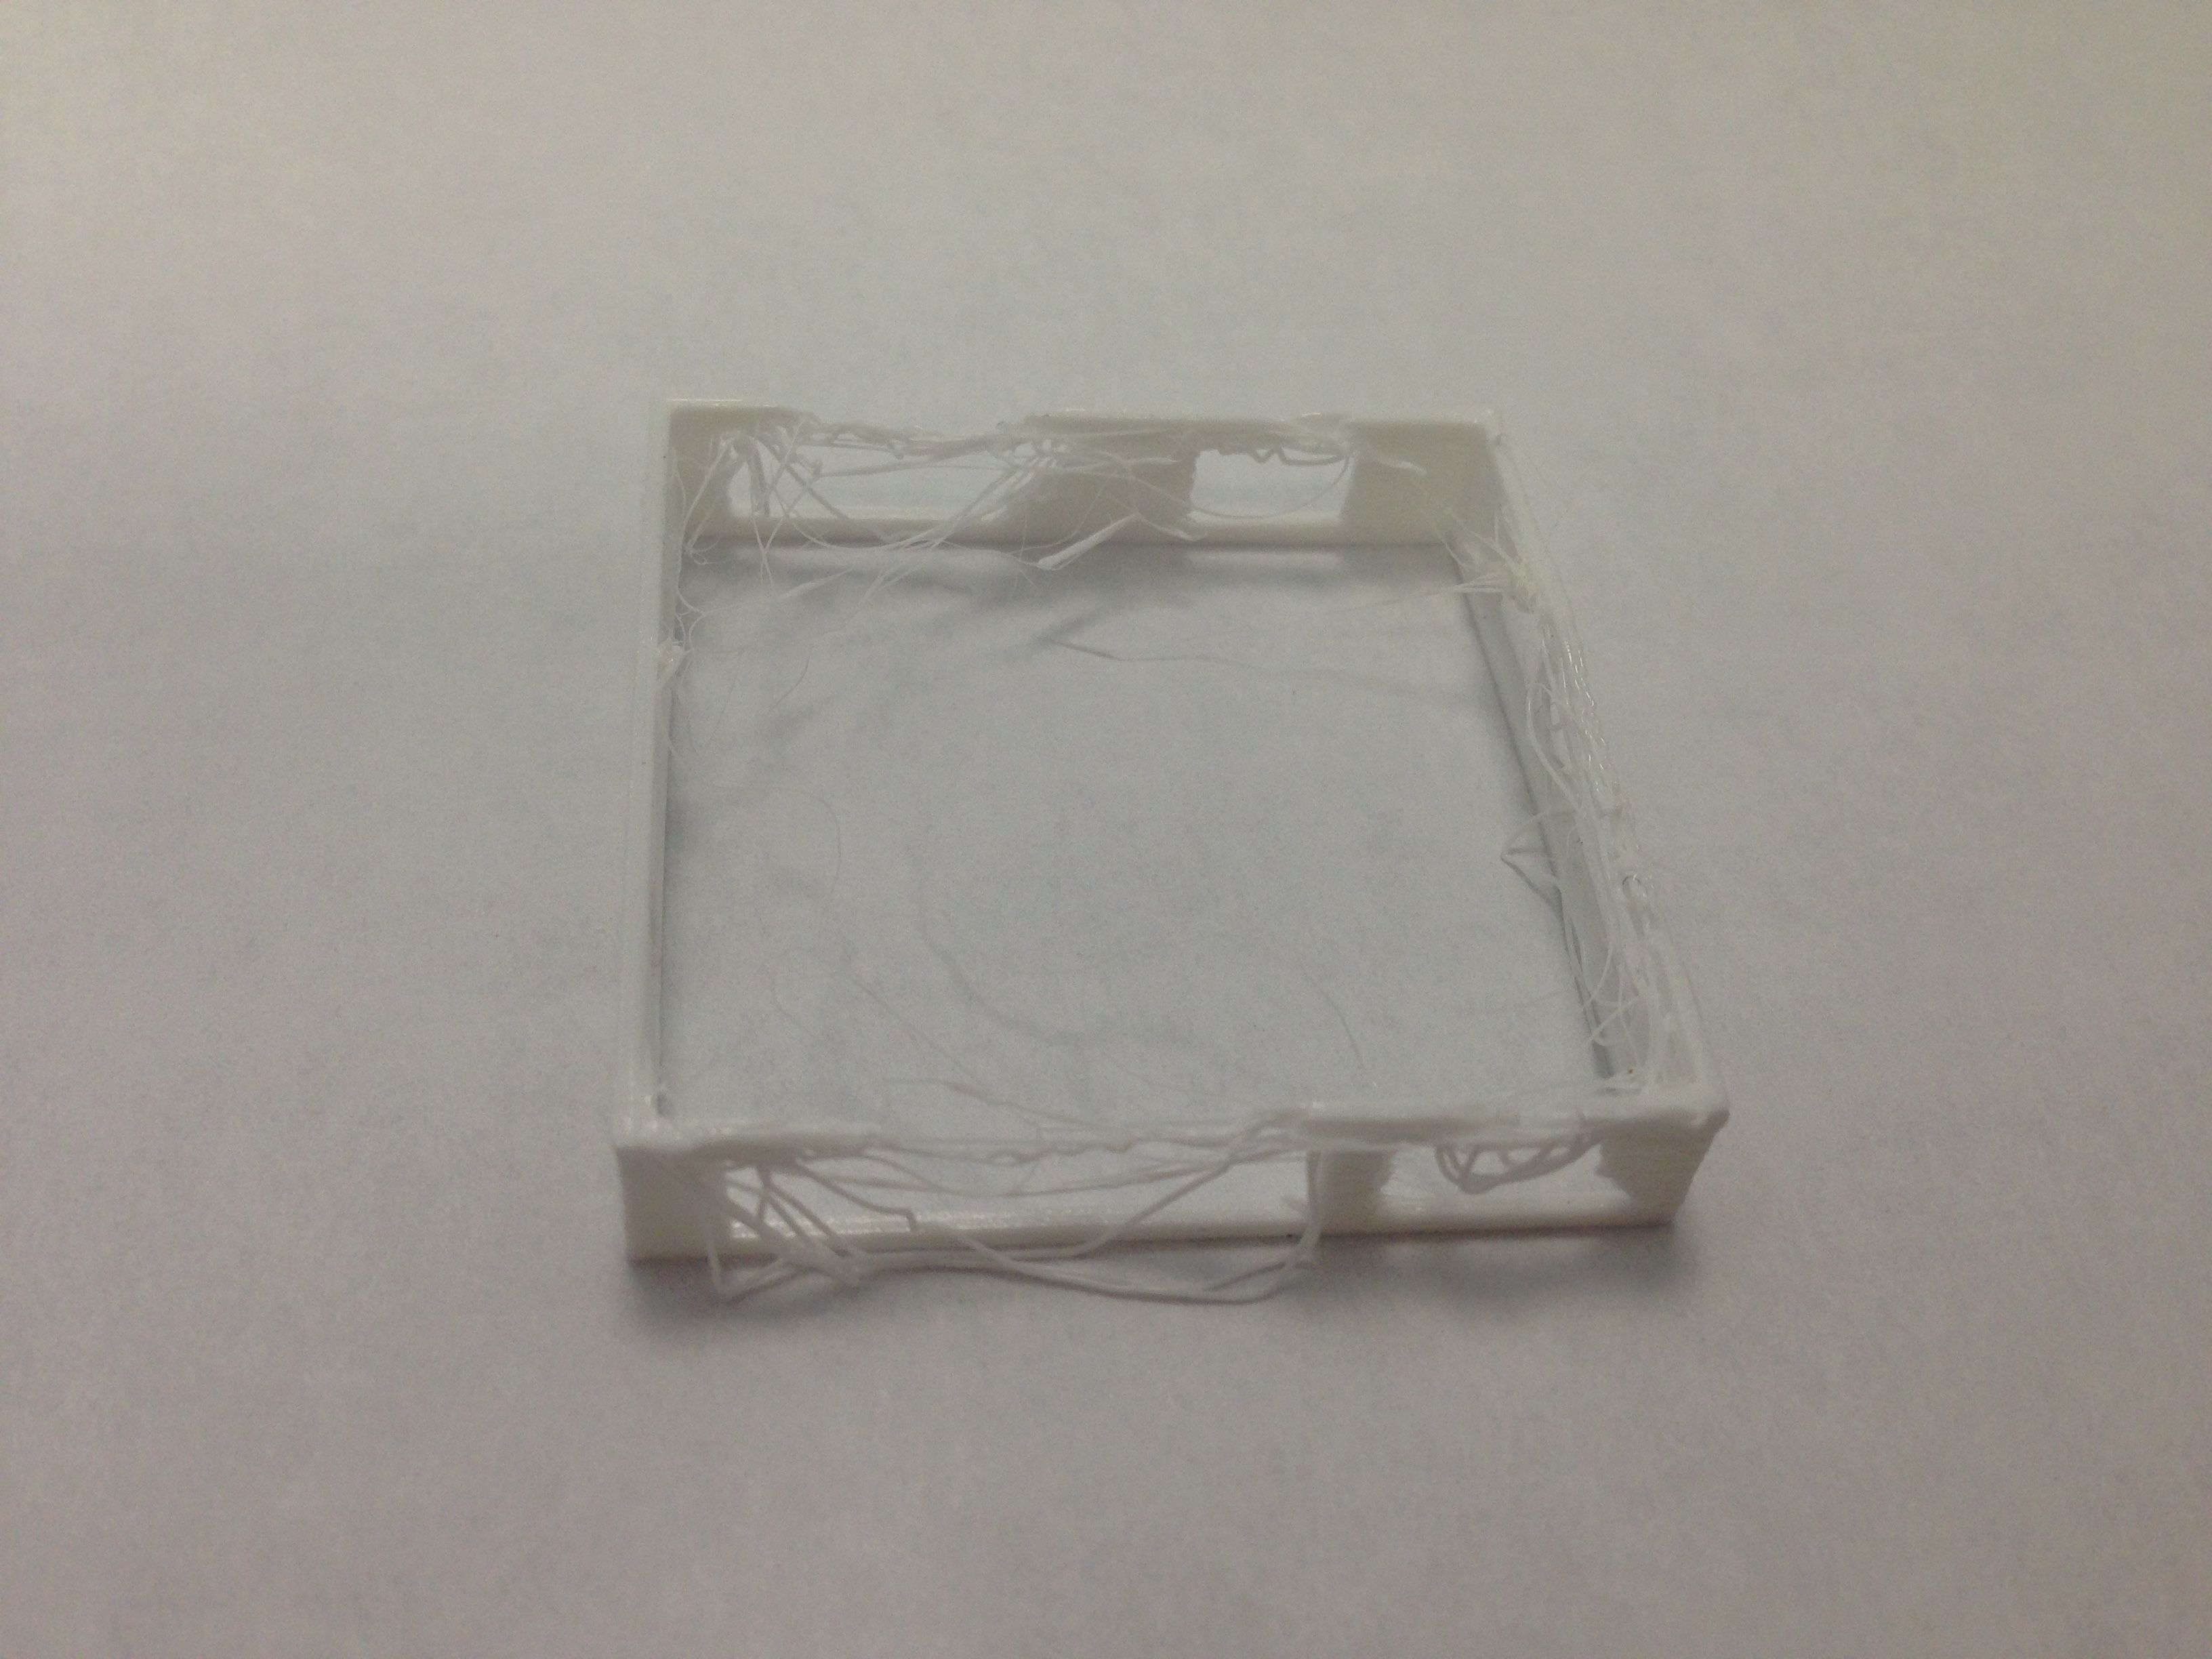
Threads
The appearance of threads in a piece may not be critical for the result of our printing but it may cause a poor finish.
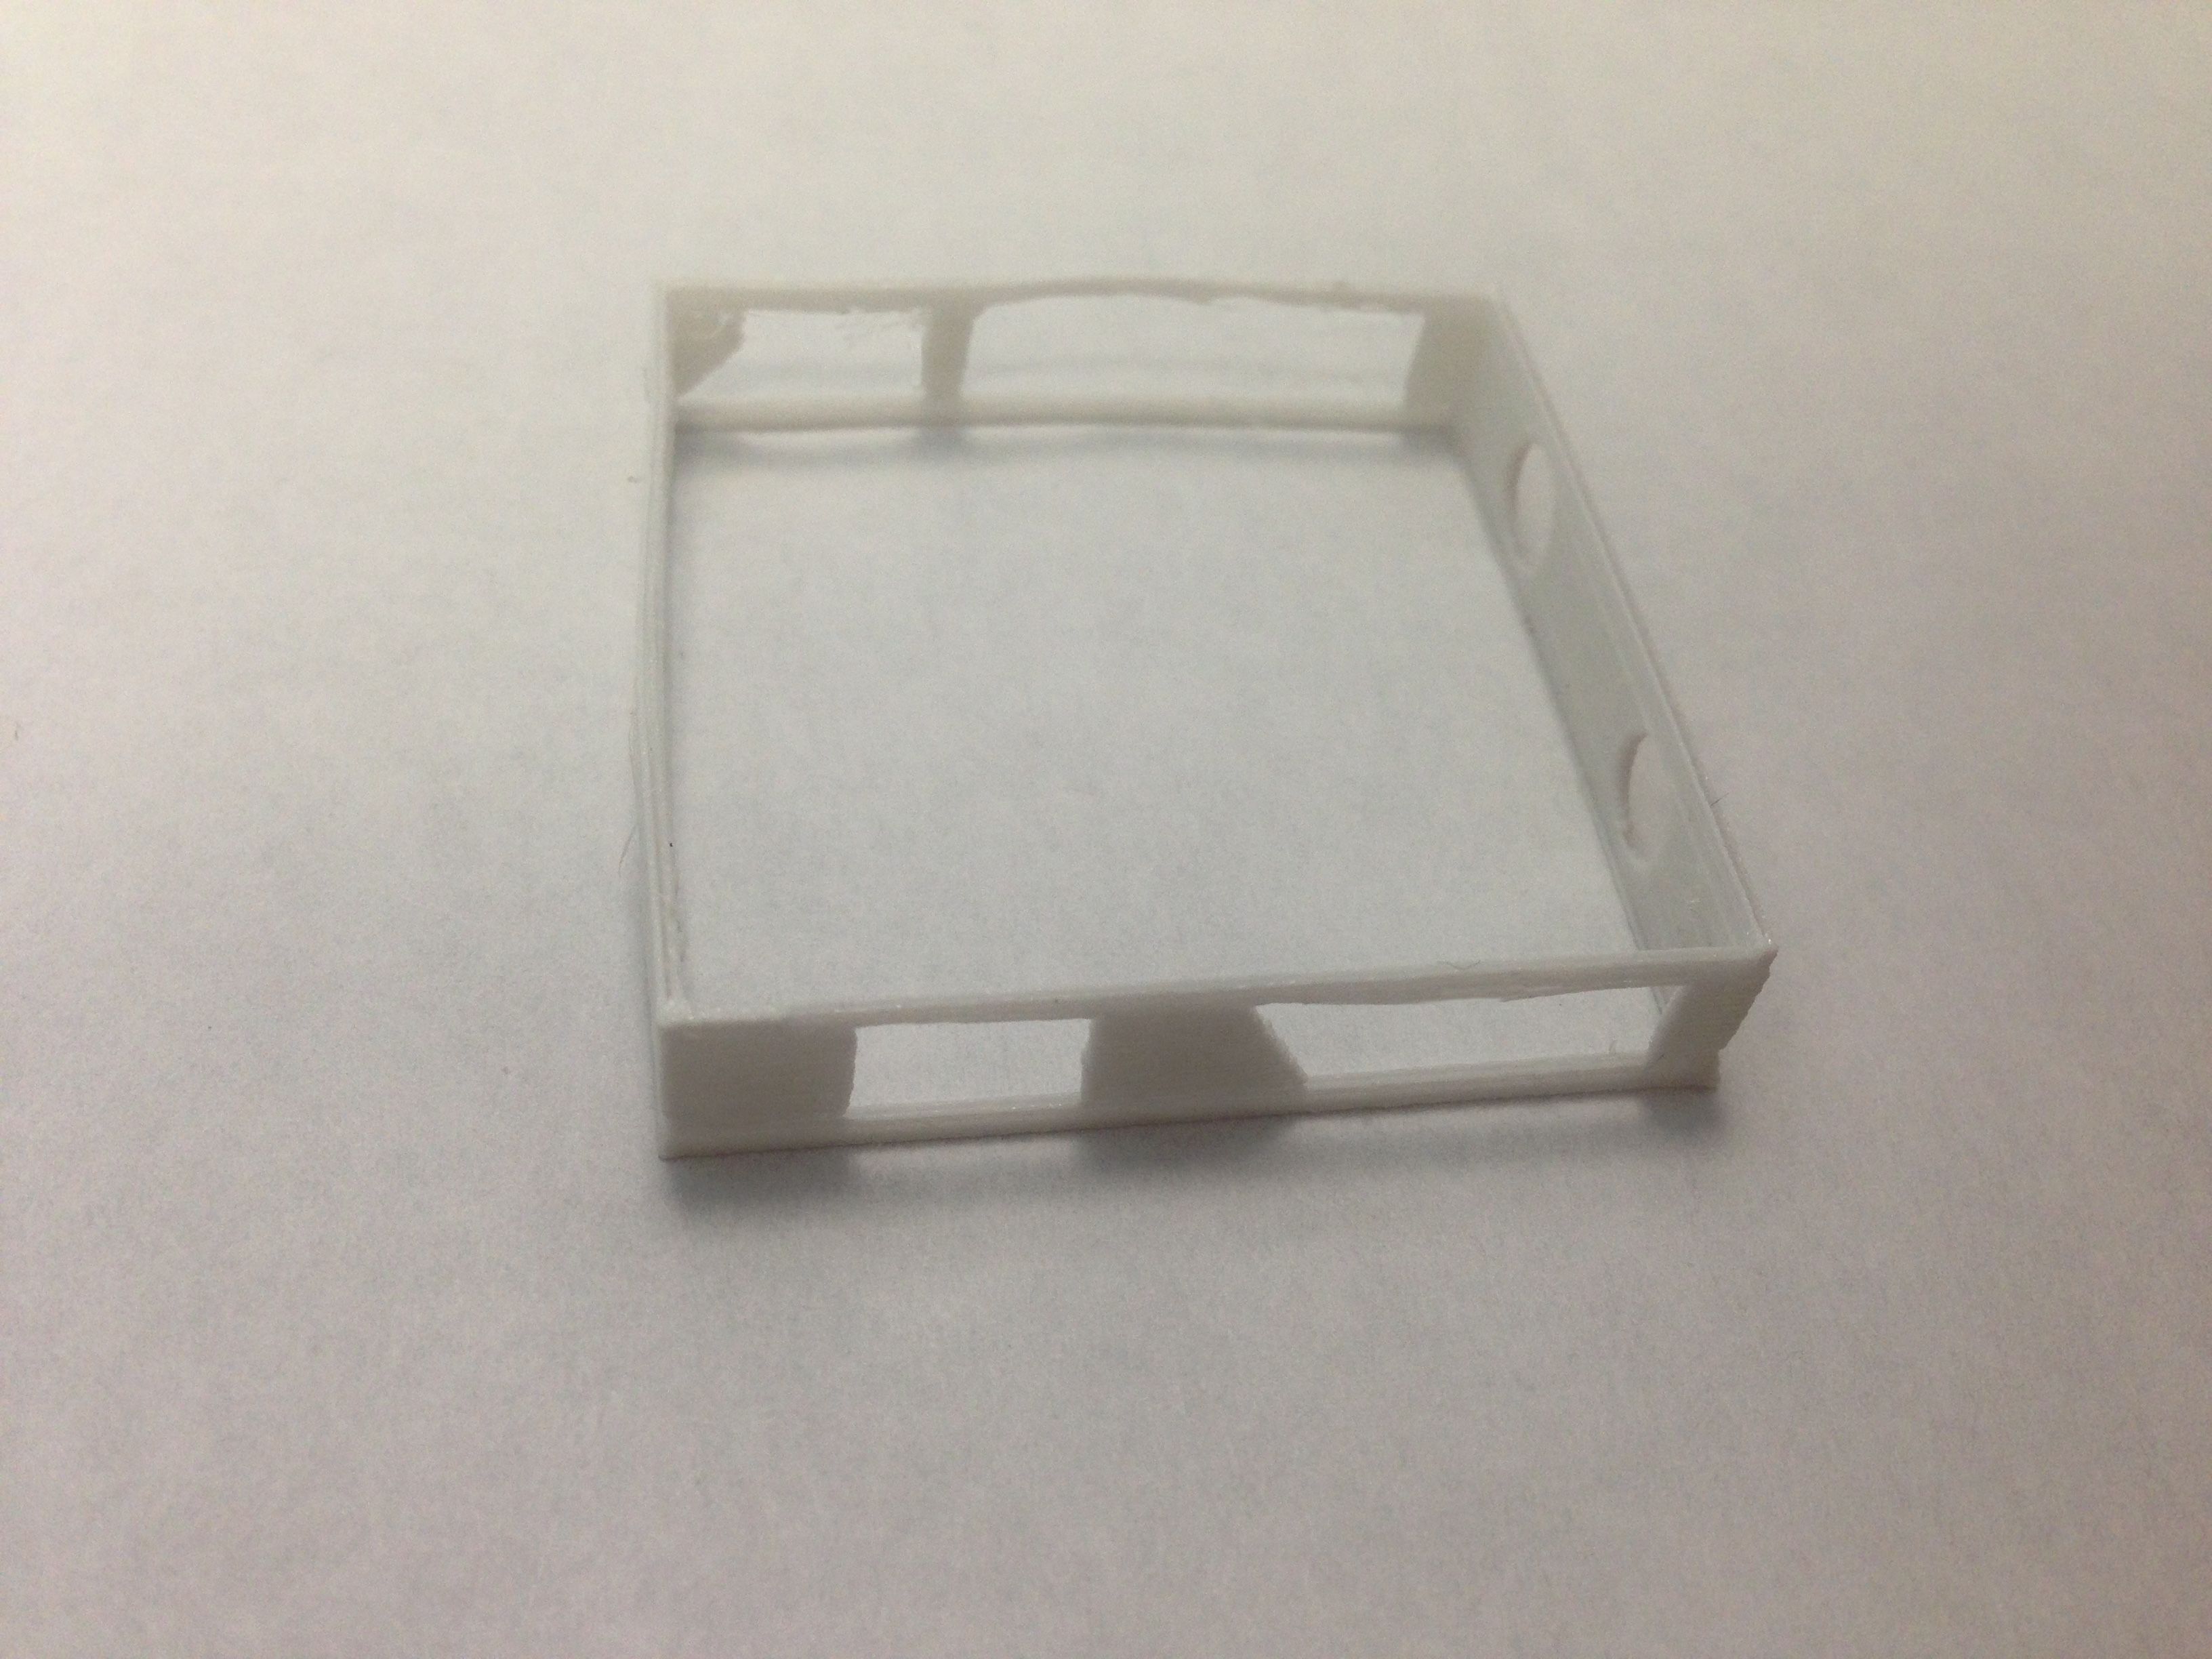
The parameters directly related to these problems are retraction and printing temperature. By decreasing the printing temperature and increasing the retraction we should eliminate the threads. We must be careful not to stray too far from the recommended parameters.
A very interesting option that almost all slicers incorporate is “Avoid crossing perimeters”. This option will force the machine not to cross the perimeters of the piece while the head is moving. This will largely prevent the appearance of threads, although it can have a negative impact on printing time.
 |
 |
Adhesion to the printing surface
Parts coming off during printing is usually not a problem with flexible filaments. What's more, we may find ourselves with excess adhesion that prevents us from removing the pieces once printed.
To help with the removal of the pieces we can use acetone or alcohol.