
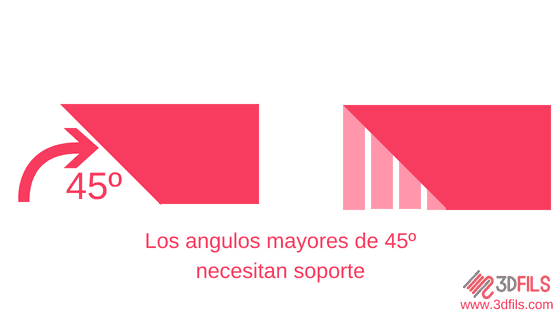
As you all know in the 3D printing Objects are built layer by layer. This means that each layer supports the next layer. This next layer may not exactly match the previous one, which means that part of the layer is exposed, i.e., not supported by the previous layer.
There is a point where this is not possible because the upper layers do not have enough support on the lower ones. This occurs when we exceed a 45º angle. To solve this problem and ensure the part holds up during printing, we need to use the support structures.
What are support structures in 3D printing?
Support structures are elements that are printed next to the model but that are not part of the original design and which serve to support the protruding parts of the models that exceed 45º.
Are support structures They can be made of the same material as the main part or, if we have an extra extruder, of another material that is easier to remove.
The support structures are created from the same program with which we prepare the 3D printing and their correct configuration is crucial to obtain a good finish in the parts in which we use them.
The support problem with flexible materials
\r\n
When we use rigid materials such as PLA, remove the Support , although sometimes tedious, is usually simple. With the right tools, we break the support structure and remove it. This is because support structures are usually thin and brittle compared to rigid materials.
_1.gif) |
| Removing flexible supports |
With the flexible materials Things change. Although the support structures remain thin, the very nature of the material means it won't break. So the only way to remove the support material is by stretching it, or in the worst cases, cutting it.
What should be taken into account when configuring support for flexible materials?
There are two key aspects when setting it up: the support pattern and the separation between the support and the piece.
As we said before, the only way to remove the support on the pieces 3D printed with flexible filament It's stretching. That's why we need to configure the support to make this task easier.
Speaking of the support pattern , it is best to reduce the contact points by trying to make the supported surface as large as possible. We must avoid types of support in which the structure intersects with each other, such as a support with a grid pattern. Our choice is always a support with a cross pattern since the area it supports is much larger but the contact points are always a single line.
To see this, we will compare the single-line pattern with the cross pattern.
_1.png)
As you can see for the same area the cross pattern supports more zones than the others with the advantage that It always maintains the minimum contact surface , unlike the grid support which, when intersecting, creates areas where removing the support will be more difficult.
The other fundamental parameter is the separation between the piece and the support. If we leave it too close, the support will fuse with the piece, making it impossible to remove. If we separate it too much, it will not be able to support the layers of the 3D printing resulting in disaster.
Recommended parameters for generating support with eFil
Taking into account all the above, the parameters we recommend for the eFil range of flexible filaments are:
| Cantilever angle | 45º |
| Density | 25% |
| Support pattern | Cross |
| Distance in Z on the support | 0.19 mm |
| X/Y distance on the support | 0.7mm |
| Priority in support distances | Z over X/Y |
Sharer:
What do I need to print with flexible filament?
How to Print PETG Matte: Settings and Recommendations for Perfect Results